Door Installation
The Best & Strongest Door Installation Kit On The Market!
Everyone from Do-It-Yourself homeowners to professional installers love The Ultimate Door and Window Bracket. A quality Canadian made product, packed and shipped straight from our Eastern Ontario facility to you!On this page you will learn why the industry is quickly adopting this new way of installing interior and exterior doors!
NO SHIMS, NO HOLES, NO MESS
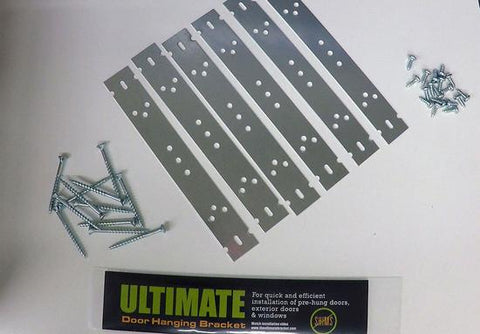
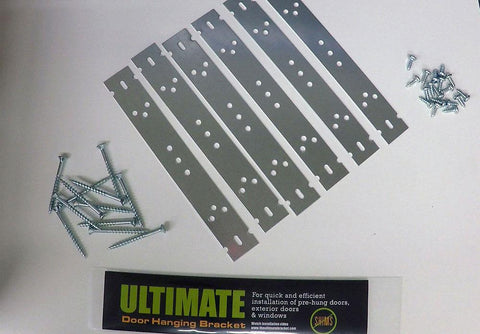
The Ultimate Bracket is fabricated using 22-gauge galvanized steel, designed to be fastened to the door jamb for an easy & efficient installation. Only 3 tools needed, level, tape measure, and drill.

PROFESSIONAL INSTALLATION
Our bracket is made to secure the jamb to both sides of the wall to ensure a strong, quality & professional installation whether it’s solid or hollow core doors. Twisted framing is not an issue any longer.
FLEXIBLE
We’ve designed The Ultimate Bracket for standard 2”x4” walls, along with drywall for a width of 4.5”, but we have also made sure that the bracket can be modified for 2”x3” and 2”x6” walls. Just one more reason to add it to your toolkit.
3 X FASTER
The Ultimate Door and Window Bracket makes builders money because it saves them time. Gain another competitive advantage with quick installs!
Step by Step Interior Door Installation with
The Ultimate Door and Window Bracket
To learn how to properly install a door, watch the videos or follow the written steps below:
Steps To A Professional Door Installation In 4 Minutes:
#1 DRAW YOUR LINE
On the visible hinge side of the opening, using a level, draw a vertical plumb line on the drywall 3/4" from the rough opening from top to bottom.
#2 ATTACH BRACKETS TO YOUR JAMB
On the hinge side, install 3 brackets to the jamb, one at each hinge using three mounting holes and 1/2" screws. Using the two vertical holes on each side to align and centre the bracket to the jamb.
Now install the other three brackets on the opposite side. Install the top bracket four inches down and bottom bracket four inches up. Install the centre bracket two inches above the door latch.
#3 PLACE YOUR DOOR
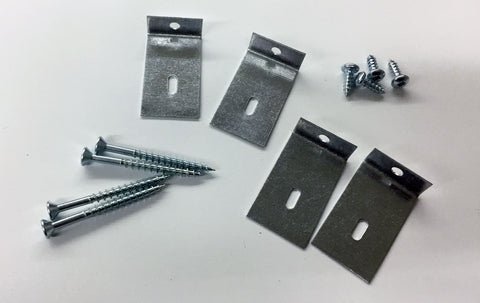
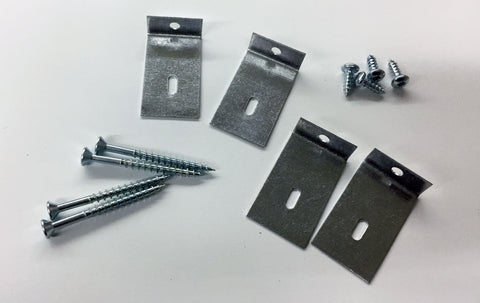
Place spacers on the floor as needed to represent the thickness of a finished floor. *The bottom of the door should be approximately 1/2 inch from your finished floor.Working with the face of the door, bend all six tabs and place the door in the opening. Open the door and bend all six tabs on the other side.
#4 SECURE TO THE WALL
Starting at the top hinge, fasten the bracket using the adjustable slot with a two inch screw lining up the notches on the 3/4 inch plumb/level line on the wall.
Working your way down, install the other two brackets on the plumb/level line. Drive the screws flush with the drywall. Your door is now level.
Continuing on the latch side, making sure to leave an equal space between the top and side of the door and jamb. Fasten the three remaining brackets with two inch screws.
#5 SECURE TO THE OTHER SIDE OF THE WALL
Continue on the other side of the door, making sure the bottom of the jamb is square with the wall and fasten this side with two inch screws.
Measure the top of the opening and verify that the same measurement is at the bottom. Fasten the three remaining brackets.
TIP: Remove centre screw in top hinge and replace with longer screw, to secure to the wall framing.
You are now ready to install the trim!
Click here to view our Door installation instruction sheet.
EXTERIOR DOOR INSTALLATION
Benefits of Installing an Exterior Door with the Ultimate Door and Window Bracket
- NO INSULATION VOIDS – Maximum R-value and energy efficiency. Save on heating costs.
- No bowing of the door jamb (Re: Patio Door installation)
- Super easy 4-step installation
- No drilling through vinyl – Which can void the warranty
- Professional installation every time
Instructions on how to install an exterior door with the Ultimate Bracket.
- Cut brackets to desired length (if required)
- Install brackets lining up “v” with the edge of door jamb
- Place door in rough opening
- Bend ends and fasten to framing studs
PROFESSIONAL BUILDERS
Industry professionals can buy brackets in bulk or email us so we can work with you to improve the efficiency of you and your team today.
Save Time, Save Money!